
Every recipe on CookZya is tested multiple times in my home kitchen before publishing — no shortcuts, just real food for real families.
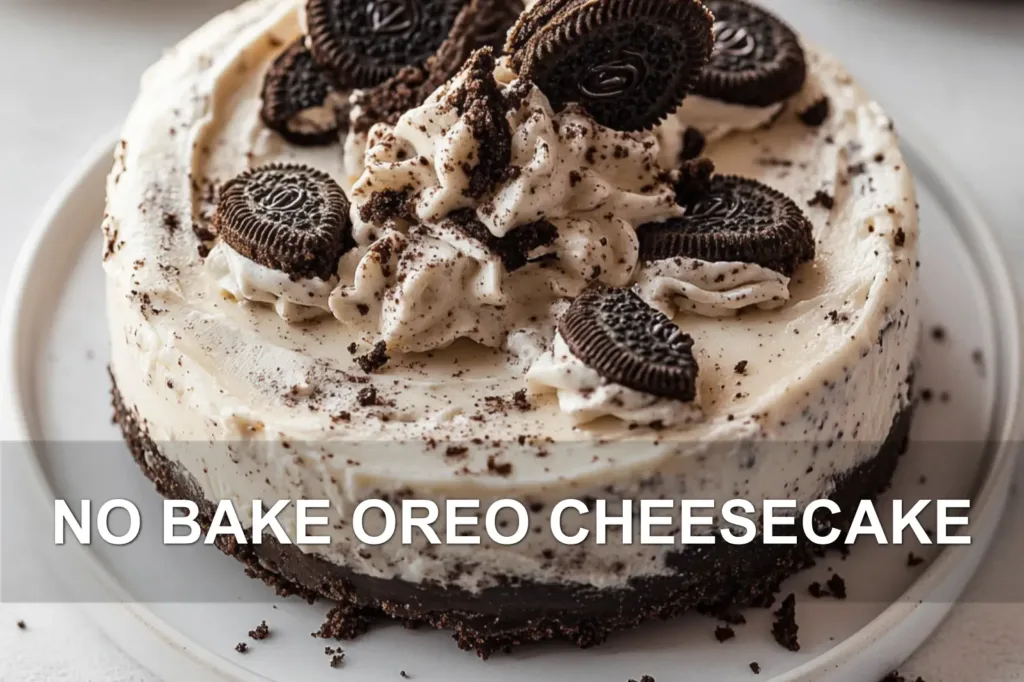
More about Emily →The first time I tasted that cold, creamy slice with crunchy cookie crumbles, I swear angels sang. There’s just something magic about a no bake Oreo cheesecake. It’s buzzing all over Pinterest and TikTok with good reason. Zero oven. Maximum chocolatey joy.
This one’s got a fluffy cream cheese base, folded with whipped topping and crushed Oreos, all tucked into an Oreo crust. It’s sweet, smooth, and wildly simple––like your best friend’s potluck dessert, but done in fifteen minutes. Full details in the blog!
I made this with my youngest, who accidentally added double the cookies. Honestly? It might’ve made it better. We’ve tested versions with fewer dishes, and tricks for faster chilling. I tested it. You’ll love the secret!
Print
No Bake Oreo Cheesecake Recipe You Will Love
- Total Time: 4 hours 25 minutes
- Yield: 10 slices 1x
- Diet: Standard
Description
Enjoy a creamy and easy No-Bake Oreo Cheesecake that’s perfect year-round. This simple recipe includes an Oreo crust and luscious filling, ideal for Oreo Cheesecake Recipes Easy No Bake and Oreo Cheesecake No Bake Easy. Discover how to make a delicious Oreo No Bake Cheesecake with ease.
Ingredients
- 24 Oreos
- 4 tablespoons unsalted butter melted 60 grams
- 16 ounces brick-style cream cheese softened
- 1 cup powdered sugar 120 grams
- 1 teaspoon vanilla extract
- 2 cups cold heavy whipping cream 480 ml
- 16 Oreos chopped
- Homemade whipped cream
- 12 to 14 mini Oreos chopped or 6 full-size Oreos cut in half
Instructions
- Crush the Oreos finely using a food processor, then combine with melted butter until well blended.
- Press this mixture evenly into the base of a 9 inch springform pan lined with parchment and chill in the refrigerator.
- Whip the cream cheese until smooth, then mix in powdered sugar and vanilla until fully incorporated.
- Separately, whip the heavy cream starting slow and increasing speed until stiff peaks form.
- Fold the whipped cream gently into the cream cheese mixture along with chopped Oreos.
- Spread the filling evenly over the chilled crust, then optionally decorate with whipped cream and additional Oreos.
- Cover and refrigerate the cheesecake for at least 4 to 5 hours or overnight before serving.
Notes
- For crisp tops, broil 2–3 minutes at the end
- Store leftover cheesecake in an airtight container in the refrigerator for up to 4 days
- You may substitute 16 ounces thawed whipped topping for the heavy cream and adjust powdered sugar accordingly
- Prep Time: 25 minutes
- Category: Dessert
- Method: Stovetop
- Cuisine: American
Nutrition
- Serving Size: 1 slice
- Calories: 400 kcal
- Sugar: 30g
- Sodium: 300mg
- Fat: 28g
- Saturated Fat: 18g
- Unsaturated Fat: 8g
- Trans Fat: 0g
- Carbohydrates: 35g
- Fiber: 2g
- Protein: 6g
- Cholesterol: 90mg
Why You’ll Love This No-Bake Oreo Cheesecake
This dessert is like a big, cozy hug of nostalgia. It’s the perfect blend of creamy, chocolatey goodness with chunks of Oreos in every single bite. If you’re short on time (or just don’t want to crank up the oven), this recipe will have you saying, “Why didn’t I make this sooner?”
- No oven needed: Skip the heat and still get a knockout dessert that everyone will adore.
- Beginner-friendly: With just a few easy steps, this is almost foolproof (mess-ups still taste pretty amazing).
- Perfect for any occasion: Whether it’s a backyard BBQ, holiday gathering, or late-night snack attack, it always fits the vibe.
- A crowd pleaser: Let’s be realwho doesn’t go back for seconds when Oreos are involved?
Key Ingredients You’ll Need
You won’t need a cluttered shopping list to make this Oreo cheesecakejust a few pantry staples and plenty of Oreos. Here’s what you’ll need:
- Oreos: You’ll need some for the crust, some for the filling, and (if you’re feeling fancy) a few for the topping!
- Cream cheese: The magic base that makes this cheesecake so rich and creamy. Make sure it’s softened for easy mixing.
- Powdered sugar: Sweetens up the cream cheese filling without leaving any gritty texture.
- Heavy whipping cream: Whisked into peaks, it gives the cheesecake its luscious, airy texture.
- Unsalted butter: Combine this with Oreo crumbs for a crust that holds together beautifully and delivers the ideal crunch.
- Vanilla extract: Just a dash for that classic, homemade flavor boost.

Pro Tip: If you’re missing a food processor for the crust, toss those Oreos in a zip-top bag and crush them with a rolling pin. Messy? Yes. Therapeutic? Absolutely!
Step-by-Step: How to Make This No-Bake Oreo Cheesecake
This recipe might look like a showstopper, but trust me, it’s wonderfully simple to pull together! Here’s what you’ll do:
- Make the crust: Pulse 24 Oreos into fine crumbs, mix with melted butter, and press into the bottom of a springform pan. Let it chill in the fridge while you prep the filling.
- Bake-free cheesecake filling: Whip up softened cream cheese, powdered sugar, and vanilla until smooth. Separately, whip the heavy whipping cream into stiff peaks, then gently fold it into the cream cheese mixture. Stir in chopped Oreos for that signature crunch!
- Assemble: Spread the fluffy filling evenly over the chilled crust. Optionally, dollop whipped cream around the edges and sprinkle with more crumbled Oreos (because why not?).
- Chill & serve: Cover the cheesecake and let it chill in the fridge for at least four hoursor overnight if you can wait! Slice it up and enjoy every indulgent bite.
| Prep Step | Estimated Time |
|---|---|
| Making the crust | 10 minutes |
| Preparing the filling | 15 minutes |
| Chilling time | 4–5 hours |
Pro Tips & Simple Variations
Want to tweak this dessert or need some troubleshooting advice? Let’s dive in:
- Customize your crust: Swap regular Oreos for Golden ones or double-stuffed! Both taste incredible.
- Adjust the sweetness: If you find the filling too sweet, cut back slightly on powdered sugar. Start with ¾ cup and add more to taste.
- Fast-track the chill: In a pinch? Pop the whole cheesecake in the freezer for 1 to 1.5 hours, though the best texture comes from fridge chilling.
- Troubleshooting the filling: If your whipped cream isn’t forming peaks, the bowl or whisk might not have been cold. Chill them beforehand for perfect results!
How to Serve & Store Your Cheesecake
This no-bake Oreo cheesecake is the ultimate “make-ahead” dessert. Here’s how to keep it fresh:
- Storage: Keep leftovers in an airtight container in the fridge for up to four days. Bonus: the longer it chills, the better the flavors come together!
- Freezing tips: Yes, you can freeze this! Wrap individual slices in plastic wrap, place them in a freezer-safe container, and freeze for up to three months. Thaw in the fridge overnight before serving.
- Serving idea: Top slices with homemade whipped cream or drizzle with melted chocolate for an extra indulgent finish.
Pro Tip: Got extra filling or crumbs? Layer them in a jar for a cute and portable cheesecake-in-a-jar dessert. Kids love it, and honestly, so do we!
Expert Says
The NO BAKE OREO CHEESECAKE relies on chilled gelatin or cream cheese to set properly without baking, preserving its creamy texture. This method preserves delicate flavors and prevents overcooking, making it a perfect no-heat dessert option that is smooth, rich, and easy to prepare.
For more delicious recipes and cooking inspiration, follow me on Facebook, Pinterest and Reddit!
Perfecting My No-Bake Oreo Cheesecake
This no-bake Oreo cheesecake recipe took several rounds to perfect. I learned the hard way that whipping the cream too little makes a dense disaster, and my kids definitely helped taste-test the “almost there” versions. After all those tweaks, this version is smooth, creamy, and just sweet enough to please everyone at the table.
FAQs ( No-Bake Oreo Cheesecake )
How long does it take for the cheesecake to set?
This recipe usually needs at least 4 hours in the refrigerator to set properly. For best texture and ease of slicing, chilling overnight is recommended. Avoid rushing the chilling process so the cheesecake firms up evenly without becoming too dense.
Can I use regular cream cheese or should it be softened?
For smooth mixing and the best texture, softened cream cheese is essential. Room temperature cream cheese blends easily with other ingredients, preventing lumps and giving this meal its signature creamy consistency. Soften by leaving it out about 30 minutes before starting.
You can substitute other chocolate sandwich cookies or crushed chocolate wafers for the crust. Graham crackers or chocolate graham crackers also work well for a similar texture with a different flavor profile. Just ensure the crumbs are finely crushed for the best crust base.
Can this recipe be made in advance and frozen?
Yes, this dish freezes well when wrapped tightly to prevent freezer burn. Freeze individual slices or the whole cheesecake for up to one month. Thaw overnight in the refrigerator before serving and gently stir the topping if needed for best presentation.
How can I make the cheesecake more stable without baking?
Adding gelatin or a commercial stabilizer can help firm up the texture if you want a more stable dessert. Alternatively, chilling it longer or whipping the cream to stiff peaks before folding it in also enhances firmness. These techniques help maintain shape without heating.

Conclusion
Whipping up this no bake Oreo cheesecake is honestly a joyjust 25 minutes active time and a few hours chilling later, you’ve got a creamy, dreamy dessert that’s cool, crumbly, and perfect for any sweet craving. You’ll love how it turns out: velvety smooth, with delightful cookie crunches that make every bite a treat. It’s one of those recipes that brings comfort, joy, and a hint of nostalgia to your table without fuss or heat.
Feel free to play around with the flavorstry swapping in Golden Oreos for a twist, or swirl in a bit of peanut butter if you’re feeling adventurous. Storing leftovers? Pop them in an airtight container in the fridge, where the flavors just get cozier over time (a little freezer stint works too, if you want to save some for later). A tip I picked up from my aunt’s kitchen: always crush your Oreos by hand when your mixer’s tied upit’s oddly satisfying and mess-free!
Now, I’d love to hear from youdid this stir up any sweet memories or family traditions? Snap a photo, share your tweaks, or just drop a comment below. Save this recipe for your next cozy night in or family gathering, and trust me, it’ll become your go-to Oreo dessert in no time. Here’s to delicious moments that feel like home, one creamy slice at a time!