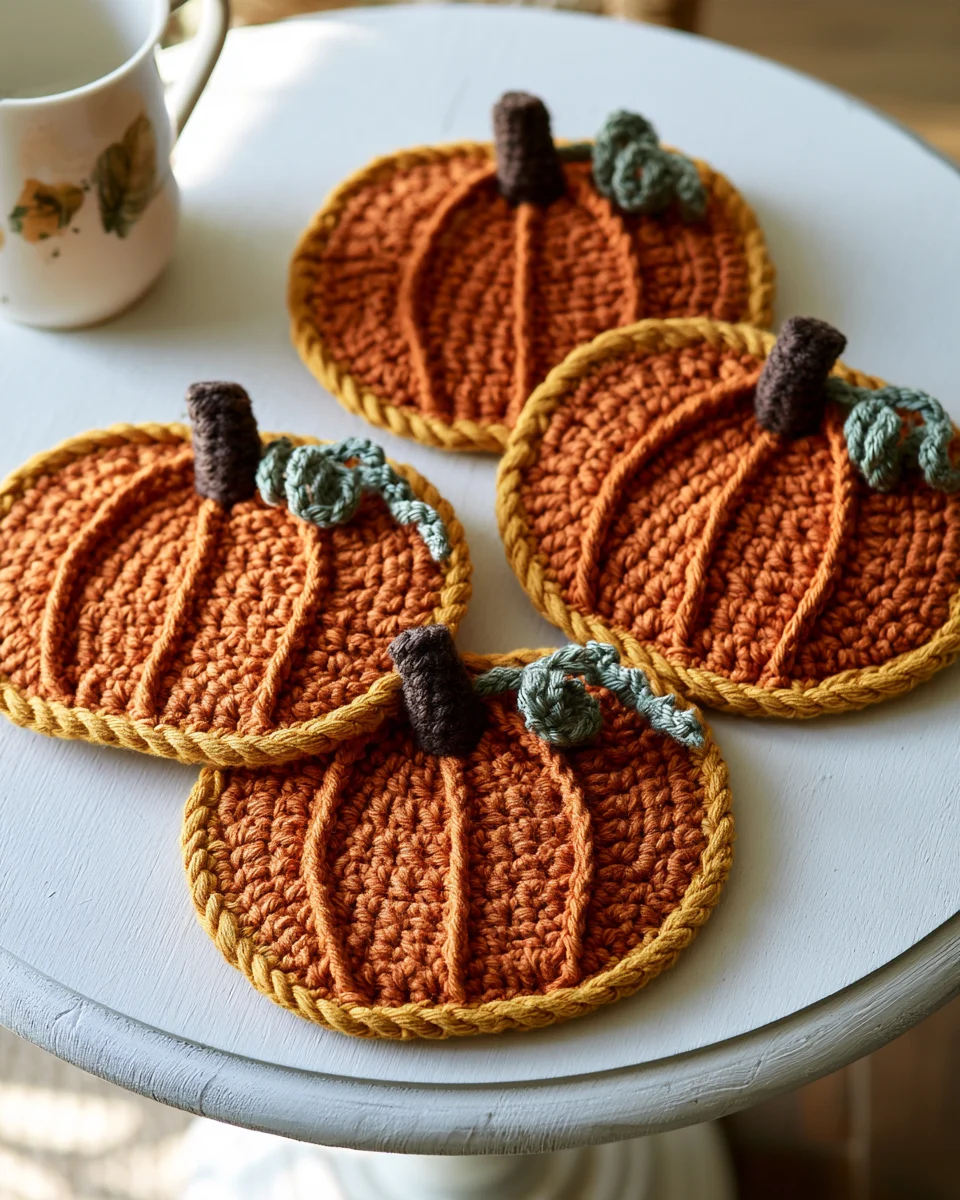
These crochet pumpkin coasters are shaped like a real pumpkin, not a circle with a stem added on top. The body is worked flat in rows of single crochet: three rows to widen, seven straight rows, then four rows that round off the top. Four ribs are drawn on afterwards with surface slip stitch, so they curve with the pumpkin, the way they do on the real thing.
A mustard crab stitch edge gives the rope look, and a rolled brown stem and two curly sage tendrils finish it. One coaster takes about 45 minutes once you know the shape, and a set of four uses small amounts of worsted cotton (24 yards or less per coaster), so it is a good stash-buster for a fall table or a hostess gift.
Every row below comes from one source file that also draws the chart, and every stitch count was replayed by our stitch simulator. Tick each row as you go — your progress stays saved in this browser.
- Finished size
- about 5 × 4.25 in (13 × 11 cm) without the stem — approximate, from the suggested gauge
- Yarn
- Worsted weight (#4) cotton in 4 colors
- Hook
- US H-8 (5.0 mm)
- Gauge
- 14 sc and 16 rows = 4 in (10 cm) — suggested, make a swatch
- Level
- Easy (rows of sc, simple increases and decreases)
- Time
- About 45 minutes per coaster
- Rows
- 14 rows + 2 edging rounds + stem and 2 tendrils
✓ CookZya original design · Stitch counts checked row by row — all 25 rows and rounds were replayed by our stitch simulator, and the written rows were rebuilt stitch by stitch to match the chart. This pattern has not been crochet-tested: tension, gauge and final size are up to your hands.
Materials
- Color A — burnt orange, about 55 yd
- Color B — mustard gold, about 20 yd
- Color C — chocolate brown, about 10 yd
- Color D — sage green, about 25 yd
- Yardage is for a set of 4 coasters, estimated from the stitch counts with a 20 % margin. One coaster: about 12 yd A, 5 yd B, 2 yd C, 5 yd D.
- Cotton is best: it shows the ribs clearly, takes heat from a mug and can be washed. Acrylic works but the coaster will be softer.
- Yarn needle, scissors, 2 stitch markers (optional, to mark the first and last stitch of a row while you shape).
Notes
- US crochet terms. sc = single crochet, hdc = half double crochet, sc2tog = single crochet 2 together, rsc = reverse single crochet (crab stitch), sl st = slip stitch, RS = right side, WS = wrong side.
- The body is worked flat in rows, from the bottom of the pumpkin to the top. The ch 1 at the start of a row does not count as a stitch.
- Odd rows are RS rows. Leave the starting tail at the bottom left so you always know which side is the right side.
- Increase = 2 sc in the same stitch. Decrease = sc2tog: insert in the stitch, pull up a loop, insert in the next stitch, pull up a loop, yarn over and pull through all 3 loops.
- Make the body, add the 4 ribs, then work the edging: the edging covers the ends of the ribs.
Chart
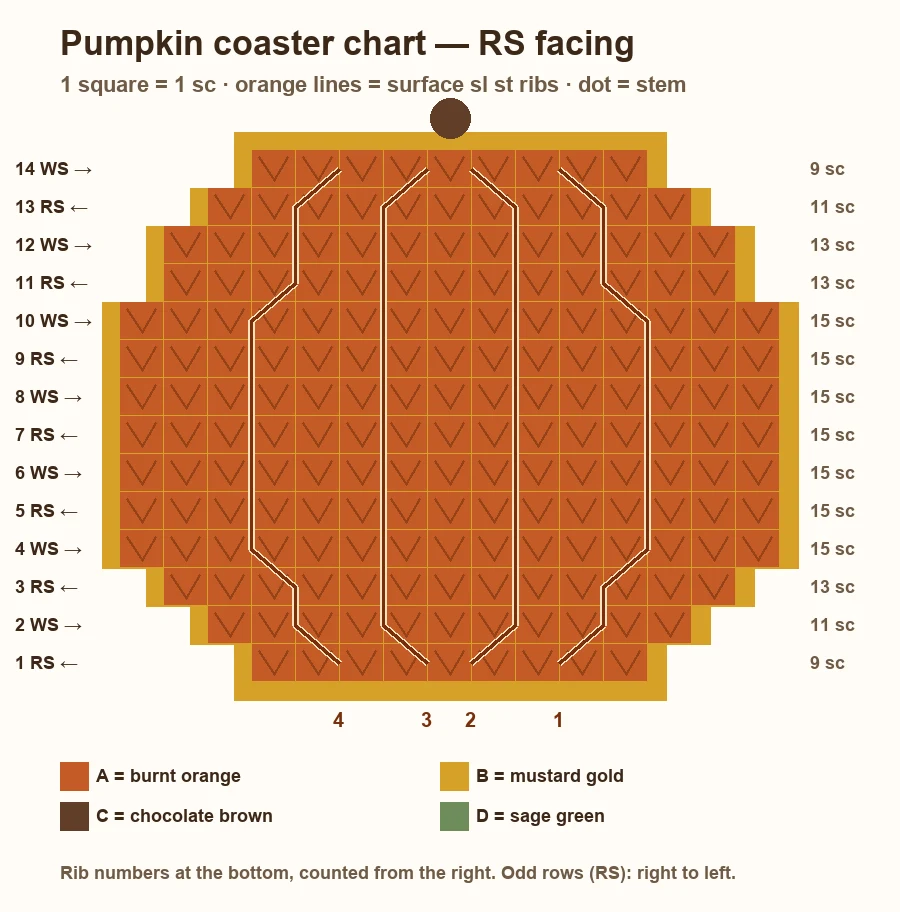
Pumpkin body
With A (burnt orange). Rows 1-3 widen the bottom, Rows 4-10 are straight, Rows 11-14 round off the top.
- With A, ch 10. 10 ch
- (RS) Sc in 2nd ch from hook and in each ch across (9 sc). 9 sc
- (WS) Ch 1, turn. 2 sc in first st, sc in each of next 7 sts, 2 sc in last st (11 sc). 11 sc
- (RS) Ch 1, turn. 2 sc in first st, sc in each of next 9 sts, 2 sc in last st (13 sc). 13 sc
- (WS) Ch 1, turn. 2 sc in first st, sc in each of next 11 sts, 2 sc in last st (15 sc). 15 sc
- (RS) Ch 1, turn. Sc in each st across (15 sc). 15 sc
- (WS) Ch 1, turn. Sc in each st across (15 sc). 15 sc
- (RS) Ch 1, turn. Sc in each st across (15 sc). 15 sc
- (WS) Ch 1, turn. Sc in each st across (15 sc). 15 sc
- (RS) Ch 1, turn. Sc in each st across (15 sc). 15 sc
- (WS) Ch 1, turn. Sc in each st across (15 sc). 15 sc
- (RS) Ch 1, turn. Sc2tog over first 2 sts, sc in each of next 11 sts, sc2tog over last 2 sts (13 sc). 13 sc
- (WS) Ch 1, turn. Sc in each st across (13 sc). 13 sc
- (RS) Ch 1, turn. Sc2tog over first 2 sts, sc in each of next 9 sts, sc2tog over last 2 sts (11 sc). 11 sc
- (WS) Ch 1, turn. Sc2tog over first 2 sts, sc in each of next 7 sts, sc2tog over last 2 sts (9 sc). Fasten off, leaving a 6 in tail. 9 sc
Ribs
With A and RS facing, work each rib in surface slip stitch from Row 1 up to Row 14. Hold the yarn behind the work, insert the hook from the front in the gap given for Row 1 and pull up a loop. Then, row by row, insert the hook in the gap given for the next row up, pull up a loop and draw it through the loop on the hook. For Ribs 1 and 2, count the stitches from the right-hand edge of each row; Ribs 3 and 4 mirror them from the left-hand edge. Fasten off to the back after each rib. Keep it loose: a tight rib puckers the coaster.
- Rows 1-2: after st 2; Rows 3-12: after st 3; Rows 13-14: after st 2. 14 rows
- Rows 1-2: after st 4; Row 3: after st 5; Rows 4-10: after st 6; Rows 11-12: after st 5; Rows 13-14: after st 4. 14 rows
- Mirror of Rib 2: the same gaps, counted from the LEFT-hand edge. Rows 1-2: after st 4; Row 3: after st 5; Rows 4-10: after st 6; Rows 11-12: after st 5; Rows 13-14: after st 4. 14 rows
- Mirror of Rib 1: the same gaps, counted from the LEFT-hand edge. Rows 1-2: after st 2; Rows 3-12: after st 3; Rows 13-14: after st 2. 14 rows
Edging
Two rounds in B (mustard gold) all around the pumpkin.
- With RS facing, join B with a sl st in the last st of Row 14 (top right corner). Ch 1, 2 sc in same st, sc in each of next 7 sts, 2 sc in last st. Work down the side: sc in the end of each row (14 sc). Work across the bottom, in the free loops of the foundation chain: 2 sc in first ch, sc in each of next 7 ch, 2 sc in last ch. Work up the other side: sc in the end of each row (14 sc). Join with a sl st in first sc (50 sc). 50 sc
- Ch 1, do not turn. Working from left to right, reverse sc (crab stitch) in each st around. Join with a sl st in first rsc (50 rsc). Fasten off. 50 rsc
Stem
With C (chocolate brown), worked flat, then rolled.
- With C, ch 7. Sc in 2nd ch from hook and in each ch across (6 sc). 6 sc
- Ch 1, turn. Sc in each st across (6 sc). 6 sc
- Ch 1, turn. Sc in each st across (6 sc). Fasten off, leaving a 10 in tail. 6 sc
Tendrils
With D (sage green). Make one long and one short tendril for each coaster: 3 hdc in every chain makes the strip twist into a curl on its own.
- With D, ch 14. 3 hdc in 3rd ch from hook and in each ch across (36 hdc). Fasten off, leaving a 6 in tail. 36 hdc
- With D, ch 10. 3 hdc in 3rd ch from hook and in each ch across (24 hdc). Fasten off, leaving a 6 in tail. 24 hdc
Finishing
Roll the stem tightly from one short end so that it is about 3/4 in tall, and sew the roll together through all the layers with its tail. Sew it to the top center of the pumpkin, over the edging, above the center stitch of Row 14. Sew the flat end of each tendril just beside the stem, the long one trailing along the top edge and the short one curling over the pumpkin; sew only the ends, so the curls stand up. Weave in all the ends on the wrong side. If the coaster curls, pin it flat, mist it with water and let it dry.
Design notes
- The shape is a real pumpkin silhouette: 9 stitches at the bottom, 15 at the widest and 9 at the top, so it sits flat and reads as a pumpkin from across the room.
- Ribs are added after the body instead of being worked into it: they can curve with the shape, and the body stays a plain, easy row of single crochet.
- The first edging round always has 50 stitches: 2 sc in each corner stitch and 1 sc in each row end.
- Odd stitch counts in every row keep one center stitch on top for the stem.
Tips for a neat pumpkin
- Count the stitches at the end of every shaping row — the count is printed in each row.
- Work the 2 sc and the sc2tog right at the edge, in the very first and last stitch: that gives the smooth stepped curve of the chart.
- Before you start a rib, lay the coaster flat and place a stitch marker in the Row 1 gap and in the top row gap: you can see the whole curve before you crochet it.
- Surface slip stitch shrinks the fabric if it is tight. Go up one hook size for the ribs if needed.
- Make all the stems and tendrils for the set in one go, then assemble.
Common mistakes
- Counting the ch 1 at the start of a row as a stitch — it isn't, and it makes the pumpkin lopsided.
- Increasing or decreasing one stitch in from the edge instead of in the edge stitch: the outline gets jagged.
- Working the edging before the ribs: the rib ends then show on top of the border.
- Skipping row ends on the sides of the edging: the coaster cups. Work 1 sc in the end of every row.
- Sewing the tendrils flat along their whole length: they lose their curl.
Make it your own
- Classic fall colors: burnt orange, mustard edge, brown stem, sage tendrils (as here).
- Farmhouse white pumpkin: cream body with a sage or gold edge.
- Make it a trivet: hold two strands of worsted cotton together with a US K-10.5 (6.5 mm) hook.
- Pumpkin garland: skip the stem's sewing, add a chain loop at the top and string several on twine.
- Gift set: tie four coasters with a ribbon and a tag — they stack flat.
Care
- Hand wash in cool water, or machine wash on cold in a laundry bag.
- Reshape while damp and dry flat — never in the dryer, the tendrils felt and lose their curl.
- Store flat, stacked, so the stems are not crushed.
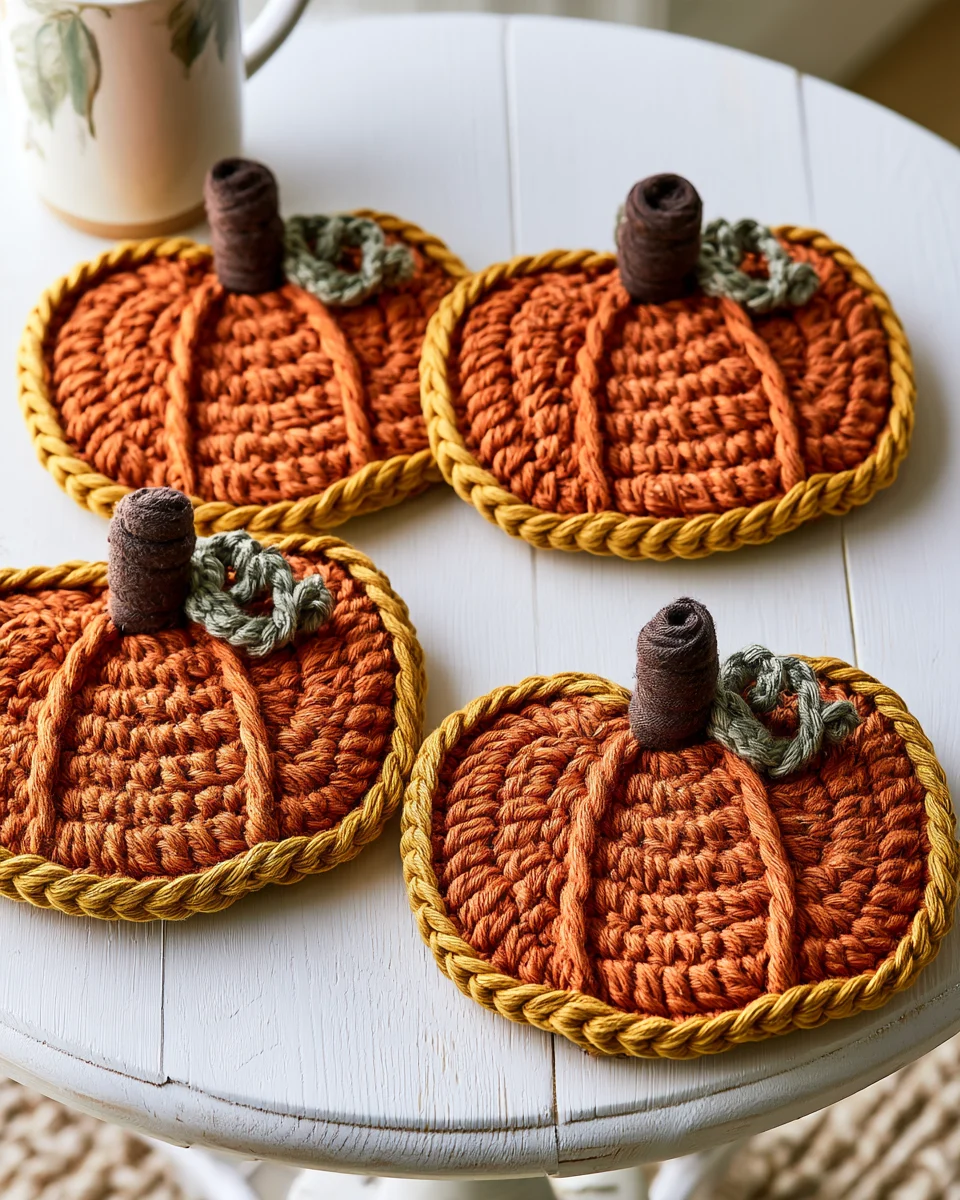
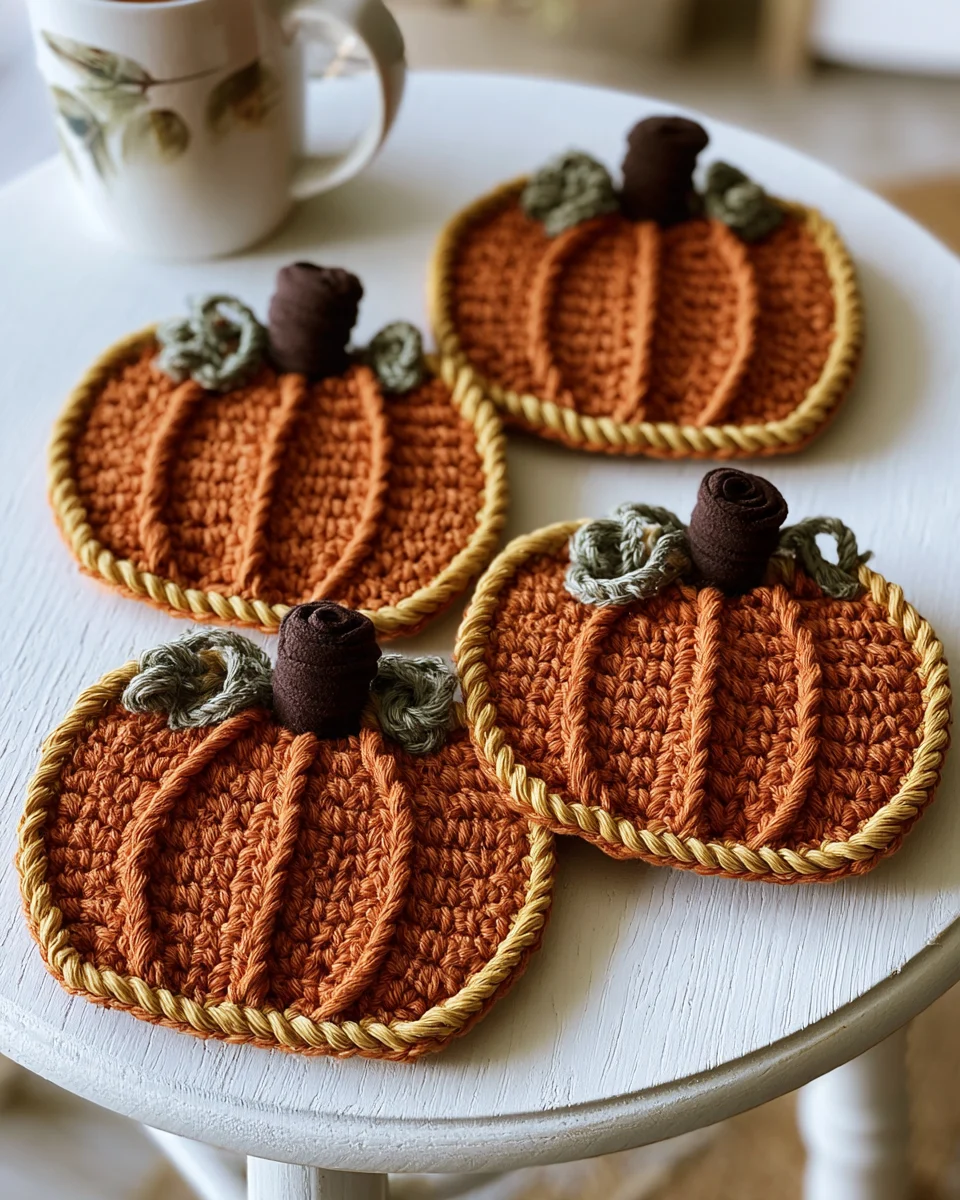
More views
FAQ
Is this crochet pumpkin coaster pattern beginner friendly?
Yes, if you can work single crochet in rows. The only extras are increases (2 sc in one stitch), sc2tog, surface slip stitch for the ribs and crab stitch for the edge — and the edge can be a plain sl st round if crab stitch is new to you.
How big is the pumpkin coaster?
With the suggested gauge it is about 5 × 4.25 in (13 × 11 cm) without the stem, big enough for a mug or a wide glass. A tighter or looser hand changes the size, so make a small swatch first.
How much yarn do I need for a set of 4?
About 55 yd of burnt orange, 20 yd of mustard, 10 yd of brown and 25 yd of sage green worsted cotton, margin included. Scraps work well.
Can I use acrylic yarn?
You can, but cotton is better for coasters: it absorbs drips, stands heat and keeps the ribs crisp.
Why work the body in rows instead of rounds?
Rows make a true pumpkin outline — wider than tall, with a flat top for the stem. A circle worked in rounds only looks like a pumpkin once the stem is on.
My coaster curls. What went wrong?
Usually a tight edging or tight ribs. Check that you worked 1 sc in the end of every row, keep the surface slip stitches loose, then pin the coaster flat, mist it and let it dry.
Can I sell the coasters I make?
Yes, you may sell the coasters you crochet yourself. Please don't sell or repost the pattern; link to this page instead.
Copyright
© 2026 CookZya — original design. Free for personal use: you may make and sell the coasters you crochet. Please don't sell, copy or repost this pattern; link to this page instead.